Install Driver Epson Stylus T13 di linux Ubuntu 10.10

12 komentar
Epson Stylus N10 Epson Stylus N11 Epson Stylus T12 Epson Stylus T13 Epson Stylus T22 Epson Stylus T22E Epson Stylus T25 Epson Stylus S22 Epson ME 10 Epson ME 32 Epson ME 33 Epson Stylus NX125 Epson Stylus NX127 Epson Stylus TX120 Epson Stylus TX121 Epson Stylus TX123 Epson Stylus TX125 Epson Stylus TX129 Epson Stylus SX125 Epson ME 320 Epson ME 330 lebih
detail bisa kunjungi alamat web berikut:

Canon IP1300, IP1700, IP1200, IP1880, IP1980 error code

2 komentar
Bagi yang memiliki permasalahan pada printer Canon IP1300, IP1700, IP1200, IP1880, IP1980, coba lihat dan hitung gerakan lampu power(hijau) dan stop/reset(orange). Dan cocokkan kombinasinya dengan daftar di bawah ini:

3x orange 1x hijau = mekanik error
4x orange 1x hijau = ink run out
5x orange 1x hijau = cartirdge black/colour bermasalah
7x orange 1x hijau = cartirdge black/colour bermasalah
8x orange 1x hijau = absorber full / direset dengan general tools
12x / 15x orange 1x hijau = cartridge detection

Diharapkan dengan memahami arti dari tanda lampu yang muncul akan lebih mudah dalam mengambil tindakan.

Ink Charge dengan Adjustment Program

4 komentar
Ink charge adalah proses penyedotan tinta yang dilakukan pompa printer untuk memperlancar keluarnya tinta. Pada kasus printer tidak terpakai lama, tinta di dalam head mengendap dan menghambat keluarnya tinta pada saat proses print. Ada sebuah fitur di dalam program Adjustment program yang jarang sekali di bahas.

Untuk software adjustment tersedia di Download Page dalam blog ini. Cari yang sesuai dengan printer anda.

  1. Buka adjustment program, lalu Yes->Accept
  2. Pilih model name dan port sesuaikan dengan printer terpasang
  3. Klik 'Particular adjustment Mode', Scroll ke ---Maintenance---Ink Charge,klik OK.
  4. Kemudian lakukan inkcharge, ingat! inkcharge menyedot sangat banyak tinta. Lebih baik jika gunakan infus atau tabungluar yang diisi dengan cairan head cleaner.
  5. Tunggu hingga kira" 15 menit.
  6. Kemudian lakukan Nozzle check dengan klik pada 'Print', dan lihat seberapa perubahan yang telah dicapai.

Semoga berhasil!

Web Hosting

Warna tidak keluar setelah printer di infus

1 komentar
Kasus umum pada printer epson setelah infus, salah satu warna tidak keluar. Karena:

1. Lupa membuka tutup karet pada tabung luar , atau pengaman selang masih terjepit sehingga tinta tidak bisa mengalir.

2. Tidak ada tinta pada cartridge, memang benar mungkin tinta di botol masih ada tapi ada kekosongan di cartrid. Coba lepas cartridge dan cek, jika kosong lakukan penyedotan menggunakan spet/suntikan tanpa jarum.

3. Karena sambungan buntu, Mungkin fitting/knee buntu.Bisa juga karena selang terjepit/ tertekuk.

4. Katup pada cartridge telah rusak / aus.Tandanya tinta tetap merembes ke luar walaupun cartridge dilepaskan dari rumah head. Solusinya ganti cartridge infus

5. Karena kualitas tinta jelek, sehingga menimbulkan penyumbatan lubang head. Jika diabaikan akan merusak head secara permanen.

6. Kerusakan head ringan, jika kasus tidak keluarnyatinta masih baru 1~3hari cobalakukan head cleaning/ink charging. Software untuk Ink charging bisa didownload disini

7. Kerusakan head permanen, jika setelah head cleaning/ink charging berulan-ulang tidak membawa perubahan bisa dipastikan head telahr usak permanen,solusinya adalah penggantian head baru.

Lihat cara melakukan ink charge dengan adjustment progam

cara refill cartrid printer canon ip2270

0 komentar
Caranya:
1. Buka tutup printer, cartrid akan bergerak ke tengah
2. ambil cartrid yang hendak diisi
3. Buka stiker atasnya(ada tulisan 810/811)
4. Ada 1 lubang 810(hitam), dan 3 pada 811(warna), perlebar lubang tersebut hingga kira" 1-2mm
5. Isi dengan menggunakan suntikan berisi tita sesuai warna.Hitam +/- 8cc(max), color masing" isi dengan 3-4cc(max). sedot/tarik kembali jika tita ternyata meluber(karena terlalupenuh bisa mengakibatkan kerusakan kartrid).
6. bersihkan tita yang ada disekitar bodycartrid terutamadi bagian chip tembaganya dengan tissue.
7. tutup stikernya lagisepertisemula. Jangan menutup lubang dengan selotip atau apapun yang mengakibatkan udara tidak bissa masuk,karena akan membuat tinta mampet.
8.pasang kembali,semoga berhasil

tips:
biasanya bingung menentukan warna pada 3 lubang pada kartrid 811(warna). Urutan warna dari cartrid 811 sesuaikan dengan urutan warna pada stiker. Jika tidak yakin tusuk salah satu lubang warna dengan suntikan kosong dan sedot. Bisa juga lakukan pembilasan pada lubang keluar tinta dengan tissue, warna yang menempelpada tissue sejajar dengan urutan warna pada kartrid.

Mengatasi blinking pada canon MP258

1 komentar
Ada beberapa cara untuk reset MP 258.

Cara 1 :

  1. Printer dalam keadaan mati dan kabel listrik terpasang.
  2. Tekan Tombol STOP/RESET dan tahan, kemudian tekan tombol POWER dan tahan.
  3. Tombol POWER masih ditekan, lepas tombol STOP/RESET, kemudian tekan tombol STOP/RESET 2 x dalam keadaan tombol power masih ditekan.
  4. Lepas kedua tombol secara bersamaan.
  5. Printer akan berproses beberapa saat (agak lama), kemudian LCD Panel akan menunjukkan angka NOL (0)
  6. Komputer akan mendeteksi DEVICE BARU, Abaikan saja .....
  7. Keadaan ini menunjukkan printer MP258 dalam keadaan SERVICE MODE dan siap direset. 
Kemudian agan download software nya disini DI SINI
  1. Siapkan 2 kertas di printer (ini untuk print pada waktu proses reset)
  2. Jalankan program Resetter MP258.
  • Klik "MAIN", maka printer akan berproses, kemudian MP258 akan print satu halaman dengan tulisan " D=000.0 "
  • Klik " EEPROM Clear ".
  • Kemudian klik " EEPROM ", dan printer akan print hasil Resetter MP258. Salah satu barisnya adalah sebagai berikut : "TPAGE(TTL=00000 COPY=00000)"
  • Matikan Printer dengan menekan tombol POWER.
  • Selesai.......

 
  • Jika tampil error E13 dengan gambar diatas, berarti catridge warna yang membutuhkan reset (mengalami runout). 
  • Caranya dengan menekan tombol STOP/RESET agak lama sampai LCD panel berputar, kemudian lepaskan. 
  • Jika error E13 muncul lagi, berarti catridge yang hitam juga butuh di reset (mengalami runout), dan gambarnya adalah sbb : 
  • Caranya sama dengan menekan tombol STOP/RESET agak lama sampai LCD panel berputar, kemudian lepaskan.   
  • Jika Sudah di ikuti cara di atas , printer MP258 yg error E13 akan normal kembali
  • Selesai .....
Error 13 ini sering terjadi pada Canon MP258 ketika catridge setelah Catridge nya direfill (di isi Ulang) kemudian dipasang lagi.
Selamat mencoba.......... 
 
Error Code/Kode Error :
E2-2 = No paper (ASF)
E3-3 = Paper jam
E4 = No ink
E5-5 = The ink cartridges are not installed or a non-supported ink cartridge is installed, or the ink cartridges are not installed properly
E8 = Waste ink absorber full, or platen waste ink absorber full
E9 = The connected digital camera / video camera does not support Camera Direct Printing
E14 = The Ink cartridges whose destination are wrong
E15 = Ink cartridge is not installed E16 - Ink remaining is unknown
E16 -E19 = Failed to scan head alignment sheet
E22 = Carriage error
E23 = Paper feed error
E24 = Purge unit error
E25 = ASF(cam) sensor error
E26 = Internal temperature rise error
E27 = Waste ink absorber full or platen waste ink absorber full
E28 = Ink cartridge temperature rise error
E29 = EEPROM error
E33 = Paper feed position error
E35 15 = USB Host VBUD overcurrent error - USB
E37 17 = Abnormal motor driver error
E40 20 = Other hardware error
E42 22 = Scanner error

cara refill cartrid printer canon ip2270

0 komentar
Caranya:
1. Buka tutup printer, cartrid akan bergerak ke tengah
2. ambil cartrid yang hendak diisi
3. Buka stiker atasnya(ada tulisan 810/811)
4. Ada 1 lubang 810(hitam), dan 3 pada 811(warna), perlebar lubang tersebut hingga kira" 1-2mm
5. Isi dengan menggunakan suntikan berisi tita sesuai warna.Hitam +/- 8cc(max), color masing" isi dengan 3-4cc(max). sedot/tarik kembali jika tita ternyata meluber(karena terlalupenuh bisa mengakibatkan kerusakan kartrid).
6. bersihkan tita yang ada disekitar bodycartrid terutamadi bagian chip tembaganya dengan tissue.
7. tutup stikernya lagisepertisemula. Jangan menutup lubang dengan selotip atau apapun yang mengakibatkan udara tidak bissa masuk,karena akan membuat tinta mampet.
8.pasang kembali,semoga berhasil

tips:
biasanya bingung menentukan warna pada 3 lubang pada kartrid 811(warna). Urutan warna dari cartrid 811 sesuaikan dengan urutan warna pada stiker. Jika tidak yakin tusuk salah satu lubang warna dengan suntikan kosong dan sedot. Bisa juga lakukan pembilasan pada lubang keluar tinta dengan tissue, warna yang menempelpada tissue sejajar dengan urutan warna pada kartrid.

Canon Error Code B200 and Error 5100

2 komentar
ERROR B200
The B200 error is "Printhead Temperature exceeded", What this means that while you were printing some document, either one or more of the printhead ink wells ran out of ink and the printing continued. Printhing without ink in the wells will OVERHEAT THE PRINTHEAD NOZZLES and can potentially burn the out. The printer has a built in temperature sensor to detect the ambient temperature and to monitor the temperature of the head. This data is always collected and monitored and saved in the EEprom data and the Service Test print data. If the error will not go away once you have unplugged the priner for at least 5 minutes, then there is the possibility that you have already burnt out the head. Remove the printhead and use a 5x magnification glass to look VERY CLOSE at all of the nozzles to see if you can detect any possible burnt out nozzle. It many come down to need a new printhead.

ERROR 5100
the 5100 is the carriage error and can be caused by 4 different sensors. First off the "Timing Strip" that passes through the back of the Carriage Assembly can be contaminated with ink spots and this needs to be cleaned. Open the cover and use your flashlight to examine the timing strip as much as you can see. You really don't have much access to this strip unless you remove the covers,..and doing that is considerable work. The other items that can cause this error are the sensor inside the carriage unit, the drive motor for the carriage asm, and of course the main logic card. However, 99.6% of the time it is the Timing strip which is easitly contaminated with splattered ink.

Working T50 and T60 Adjustment Program Resetter

23 komentar

For every one who require Epson T50 and Epson T60, now 'working' resetter  for  these epson printers available for download here. Thanks to OrTHoTaMiNe for making this software work fine to everyone needs and absolutely free of charge.

Click here to download 'working' Epson T50/T60 Adjustment program.


or you can view all software here.

How to use adjustment program:

  1. Download the file, save file to any  location on your computer
  2. Then running adjustment program by click
  3. Click accept, and click SELECT and select to auto or port detected, then OK
  4. Click the'Particular adjustment mode' button
  5. Scroll down to---Maintenace---and double click on Waste Inkpad Counter         
  6. Make 'check' both to Mainpad Counter and Platen Pad Counter
  7. You can click Check button before, to read both of Counter Value, then make 'check' again and click Initialization to reset the counter value.
  8. Restart printer, then click OK button. 
  9. Exit program by click Finish button, then Previous page and Quit

cara service printer epson foto r290 bila cartridge tidak terdeteksi printer epson foto 290

0 komentar
Keyword yang panjang? Keyword tersebut saya ambil dari seseorang yang sedang mencari sebuah jawaban, pada Google tentu saja. Dari judul diatas sudah jelas menggambarkan bagaimana situasi yang terjadi pada printernya.

Langsung saja, inilah yang harus dilakukan:

-printer epson foto r290 bila cartridge tidak terdeteksi printer-
Jika cartridge tidak terdeteksi (jika) yang dimaksudkan disini adalah tidak tampil dalam status monitor pada komputer, maka perlu diperiksa sambungan dari komputer(USB) ke printer. Dan apakah printer dalam keadaan aktif? Jika semua sudah, berarti ada kesalahan driver dalam menampilkan status monitor.
Solusinya:
  1. Lepas semua koneksi(USB)ke printer.
  2. Uninstal driver, restart
  3. Instal ulang driver dan koneksikan kembali.
  4. Cek ulang status monitor

-printer epson foto r290 bila cartridge tidak terdeteksi printer-
Jika cartridge tidak terdeteksi (jika) yang dimaksudkan disini adalah muncul peringatan tinta tidak terinstal/tidak dikenali.
Solusinya:
  1. Jika menggunakan cartridge original, pastikan warna apa saja yang habis/tidak dikenali, ganti.
  2. Jika menggunakan sistem infus, lakukan cara berikut ini:
  3. Tekan tobol tinta, sampai menunjuk ke 6 warna(6klik).
  4. Saat tekan teakhir, carriage berada dalam posisi penggantian tinta.
  5. Stop! Cabut colokan listrik tanpa perlu mematikan tombol turn off - cabut aja
  6. Keluarkan ke6 cartridge dari tempatnya
  7. Periksa apakah kontak basah? bersihkan dengan tissue hingga mengering
  8. Periksa apakah chip basah? Keringkan dan bersihkan dengan tissue. Jika chip berkarat coba bersihkan dengan penghapus pensil sampai bersih.
  9. Pasang kembali cartridge, geser carriage ke ujung kanan
  10. Nyalakan printer, cek lagi.

Jika masih tidak dikenali, coba ganti cartridge (atau chip autoresetnya saja jika ada). cartridge/ chip autoreset banyak dijual oleh toko-toko yang melayani pemasangan infus.

Langkah terakhir adalah yang paling berat, jika semua sudah dilakukan dan hasilnya tetap, berarti kerusakan ada pada kontak/mainboard printer. Doakan saya punya waktu untuk menulis ini lebih lanjut ke kontak atau  mengenai cara servis mainboard. Semoga yang sedikit ini bisa membantu, amin.

Saran keyword:
cartrid tidak dikenali oleh printer R290
status monitor tidak terbaca komputer
lampu tinta menyala tidak bisa proses print
epson stylus photo r290 no cartridge or cartridge not recognize

Installing the HP Printer Driver on a Network Server Connect

6 komentar
Overview
There are primarily two server configurations that allow the HP Deskjet 1220c and the HP Deskjet 1180c series printers to be used in Client/Server or Network Connect environment. These configurations are:
  • Locally Shared (Direct) Connect
  • HP Jetdirect Connect
Figure 1: Locally Shared (Direct) Connect
Using a Locally Shared (Direct) Connect configuration, the printer is connected directly to the port of a computer running Novell NetWare or Microsoft(R) Windows. This computer is known as the server or host. The server can then be configured to allow other computers on the same network, called client or remote computers, to use (or share) the printer. Locally sharing a printer is a low-cost, easy way for multiple users to share a printer. It is recommended only for small workgroups with a small number of users, or for a group requiring limited printer usage.
Figure 2: HP Jetdirect Connect
Using an HP Jetdirect Connect (Client/Server) configuration, print jobs sent from client computers travel across the network to a Novell NetWare or Windows-based server. The Novell NetWare or Windows-based server will spool all the print jobs for the printer and then send them to the HP Jetdirect print server (which sends them to the printer) one at a time.
Configuring the server
The instructions that follow may be used to install and configure the HP Deskjet 1220c or HP Deskjet 1180c printer for use with a Novell NetWare or Windows-based server.
Windows 95/98, NT 4.0, and 2000
  1. Set up the printer following the "Setting Up" steps in the User's Guide or Setup Poster.
  2. Connect the printer to an external HP Jetdirect print server or to the parallel port of a Windows-based server.

    NOTE: If the printer will be connected to an HP Jetdirect external print server, configure the HP Jetdirect print server for use on the network. Refer to the documentation that came with the print server for help configuring the device.
  3. Insert the HP Deskjet 1220c or HP Deskjet 1180c Starter CD into the CD-ROM drive. After a few seconds, the menu for the Starter CD should appear automatically. If not, use the following steps to run the driver installation program.
    1. Click Start and then click Run .
    2. In the Open box, type the letter of your CD-ROM drive followed by :\SETUP.EXE and press Enter. For example, if the CD-ROM drive letter is D, type D:\SETUP.EXE and press Enter.
  4. Click Install Printer Software when the Starter CD menu appears.
  5. You must accept the Software License Agreement in order to install the printer driver.
  6. The steps required to finish installing the driver will depend upon how the printer is connected to the network.
    Locally Shared (Direct) Connect
    1. When asked "How is your printer connected to this computer?" select Connected directly to this computer and click Next .
    2. Select a port (the default is LPT1) and click Next .
    3. Follow the instructions on the screen to complete the driver installation.
    HP Jetdirect Connect
    1. When asked "How is your printer connected to this computer?" select Connected via the network and click Next .
    2. When asked "What network printer setup do you want to use?" select Windows NT Server or Peer-to-Peer Setup and click Next .
    3. Follow the instructions on the screen to complete the driver installation.
  7. Exit the Starter CD Menu and click Start , then click Settings , and then click Printers .
  8. Right-click the HP Deskjet 1220c or HP Deskjet 1180c printer icon and click Sharing . If the Sharing option does not appear using Windows 95/98, enable printer sharing using the following steps:
    1. Click Start , then click Settings , and then click Control Panel .
    2. Double-click the Network icon and click the File and Printer Sharing button.
    3. Check the option I want to be able to allow others to print to my printer(s) and choose click.
    4. Click OK and close the Control Panel.
  9. Select Shared or Shared As and enter a Share Name for the printer (for example, DJ 1220c). This is the name that client computers will use to access the printer.

    NOTE: Windows NT 4.0 and 2000 allows printer drivers for multiple operating systems to be assigned to a printer. A client computer can request the Windows NT or 2000 server to send a compatible printer driver across the network, provided one has been assigned to the printer. These drivers are known as Alternate Drivers in NT 4.0 and additional drivers in Windows 2000. If the client and server both run the same operating system, an alternate driver is not necessary. An alternate driver should be installed if you're running a Windows NT server with Windows 95/98 clients.
  10. If an alternate driver is not needed, click OK and continue with Step 11. Otherwise, the alternate driver for Windows 95/98 clients may be installed onto a Windows NT server using the follow steps:
    1. Highlight the Windows 95 operating system from the Alternate Drivers listing and click OK .
    2. A prompt will appear requesting the location of the driver's .INF file. Browse to the Starter CD's \WINDOWS\PCL3\WIN9X\ENU folder and select the HP1220C.INF or HP1180C.INF file.
    3. Click OK to install the alternate driver.
  11. Close the Printers window. The printer should now be accessible to other network users.
Novell NetWare
  1. Set up the printer following the "Setting Up" steps in the User's Guide or Setup Poster.
  2. Connect the printer to the HP Jetdirect print server using an IEEE-1284 compliant parallel cable.
  3. Configure the HP Jetdirect print server for use on the network. Refer to the documentation that came with the HP Jetdirect print server for help configuring the device for use with Novell NetWare.

    NOTE: The Windows 95/98 and Windows NT 4.0 printer drivers included on the HP Deskjet 1220c or 1180c Starter CD support installation using Novell Distributed Printer Services (NDPS).For Windows 95/98, use the DJ1220C.INF or DJ1180C.INF file located in the \WINDOWS\PCL3\WIN9X\ENU folder.For Windows NT 4.0, use the DJ1220C.INF or DJ1180C.INF file located in the \WINDOWS\PCL3\WINNT\ENU folder.Refer to Novell's documentation for additional information on configuring a printer for installation using NDPS.
Configuring the clients
After the printer driver has been configured for use on the Novell NetWare or Windows-based server, each of the client computers must be configured to access the printer. There are many ways to configure a client computer to enable it to use the printer.
Install the driver using Point and Print
A Point and Print installation will copy the required printer driver files from the server to the client system (across the network). Any of the following Point and Print methods may be used to install the printer driver onto the client system.
  • Dragging a document onto a network printer icon.
  • Dragging a network printer icon into the Printers Folder.
  • Double-clicking a network printer icon.
  • Right-clicking a network printer icon and selecting Install.

    NOTE: The network printer icon can be found using the Network Neighborhood. Open the Network Neighborhood icon on the Windows Desktop and locate the entry for the host computer. The name of the network printer icon will be the same as the Share Name that was created in the "Configuring the server" section above.
Install the driver using the Add Printer Wizard
  1. Click Start , then click Settings , and then click Printers .
  2. Double-click Add Printer .
  3. When asked how the printer is attached to the computer:
    • For Windows 95/98, select Network Printer and click Next .
    • For Windows NT 4.0 and 2000, select Network printer server and click Next .
  4. In the box provided, enter the network path to the printer. The printer's full network path consists of the host computer name and the Share Name given to the printer in the "Configuring the server" section. The network name will have the form: \\ComputerName\PrinterShareName. Alternatively, Windows NT 4.0 users may select the printer from a list of Shared Printers. Windows 95/98 users may select the Browse button to locate the printer.
  5. Once the printer has been entered or highlighted from a listing, click OK and follow the instructions on the screen to complete the installation.

Install the driver using the driver's SETUP.EXE program
  1. Insert the HP Deskjet 1220c or HP Deskjet 1180c Starter CD into the CD-ROM drive. After a few seconds, the menu for the Starter CD should appear automatically. If not, the following steps may be used to run the installation program.
    1. Click Start and then click Run .
    2. In the Open box, type the letter of your CD-ROM drive followed by :\SETUP and then press Enter. For example, if the CD-ROM drive letter is D, type D:\SETUP and press Enter.
  2. When asked how the printer is attached to the computer, select Connected via the network and click Next .
  3. Click Client Setup and click Next .
  4. Click the Browse button.
  5. Either type in the network path to the printer or locate the printer in the Microsoft Network listings. The printer's full network path consists of the host computer name and the Share Name given to the printer in the "Configuring the server" section above. The network name will have the form: \\ComputerName\PrinterShareName.
  6. Click OK once the printer is highlighted or entered, and then click Next . Follow the instruction on the screen to complete the installation.

    NOTE: If the server is running Windows NT 4.0 and you wish to install the Windows 95/98 driver to client computers over the network, a Windows 95 alternate driver must be installed onto the server. If the client and server are both running the same operating system, an alternate driver is not necessary. Refer to the "Configuring the server" section above for instructions on installing the alternate driver.

Cara Service Printer HP Deskjet Mati Total / Matot

0 komentar
  1.  Printer HP 3325, 3535, 3744, 3920, 3940, 2466, 2566, dll sering juga rusak mati total / matot. Jika anda mengalami hal ini, anda mungkin dapat mencoba rahasia trik service berikut ini. Trik rahasia service printer HP Deskjet yang mati total / matot ini mungkin belum pernah di tulis oleh blog ataupun web yang lain. Di blog ini saya akan memberikan trik rahasia service printer HP Deskjet yang mati total / matot ini secara gratis untuk anda semua pengikut setia blog ini. Printer HP 3325, 3535, 3744, 3920, 3940, 2466, 2566, dll yang sering rusak mati total / matot ini kemungkinannya ada 2 : 1. Rusak adaptornya. Anda harus cek dulu output adaptornya dengan multitester, ada tegangan output kisaran 32v dan 15v atau tidak. Kalau rusak maka adaptor harus diganti. Tapi ini jarang sekali terjadi. 2. Rusak Boardnya. Kalo ini, indikasinya lampu power tidak nyala sama sekali. Cara servis printernya akan saya jelaskan di bawah ini. Cara servis printer HP 3325, 3535, 3744, 3920, 3940, 2466, 2566, dll adalah sebagai berikut : 1. Bongkar printer HP anda dan ambil board printernya. Kira-kira bagannya seperti gambar di bawah ini. (maaf belum punya gambarnya)
  2. Kemudian cari diodanya seperti yang saya tunjukkan pada gambar di atas. Bentuk fisik dari diodanya seperti gambar di bawah ini: Kemudian cek diodanya dengan multitester. Cara ceknya arahkan penunjuk multitester ke Ohmmeter x10. Colokkan ujungnya ke masing-masing kaki dioda, kemudian balik ujungnya. Dioda yang short / rusak, jarum akan bergerak semua ketika ditest bolak balik ujungnya. Tapi Dioda yang baik, jarum akan bergerak cuma sekali di salah satu test. 3. Jika diodanya rusak, carilah Dioda biasa yang ukurannya 2 ampere. Kemudian gantilah dioda yang rusak dengan dioda 2 ampere ini. Dioda 2 ampere seperti gambar di bawah ini :
  3. Setelah diganti, sebelum board dipasang kembali, coba cek dulu dengan mencolokkan adaptornya ke board ini. Nyalakan, dan lampu power jika menyala kedip-kedip berarti servisnya berhasil. Tapi jika masih mati, dan dioda anda masih dalam kondisi bagus, berarti kerusakan sudah merembet ke IC chipset utama board printer HP ini. Kalo sudah kena IC utama, berarti anda harus ganti board printer HP rusak ini dengan board yang baru, mungkin kisaran harganya sekitar 175rb-an. Semoga berhasil .....

EPSON L100 & L200

9 komentar
Setelah bertahun-tahun mempelajari cara menggunakan printer di pasar Indonesia yang yang kebanyakan memodifikasi printernya dengan pihak ketiga untuk mengejar biaya cetak menjadi lebih murah, PT Epson Indonesia meluncurkan printer pertama di dunia yang menggunakan sistem tangki tinta, yakni Epson L 100 dan printer multi fungsi, Epson L 200.


Menurut Kazuo Nakamura, General Manager InkJet Printer and Design Department Seiko Epson Coorporation, disela peluncuran produk terbaru Epson, 15 Oktober 2010 lalu di Jakarta, Epson sengaja menghadirkan feature Epson Original Ink Tanks yang membantu pengguna me­ning­katkan produktivitas dan meng­hemat biaya cetak.

“Masih meng­usung teknologi Print Head Epson Micro Piezo, kedua printer ini mampu menghasilkan detil cetak foto yang luar biasa dan gradasi yang sangat halus,” jelas Kazuo.
Printer L100 dan L200 hadir dengan satu set tinta yang terdiri dari satu botol tinta hitam ukuran 70 ml seharga US$ 5,5 yang dapat mencetak 4000 halaman B/W dan tiga botol cartridge tinta berwarna yang dapat mencetak 6500 halaman berwarna.
Sementara untuk biaya cetak, kedua printer ini menawarkan biaya cetak per halaman yang cukup rendah, yakni Rp 14 per halaman B/W dan Rp 23 per halaman dokumen berwarna.

Kalau biasanya penggantian tinta menjadi hal yang sangat menjengkelkan, tidak dengan L100 dan L200, begitu menu­rut M Husni Nurdin, Deputi Country Manager PT Epson Indonesia. “Kedua printer ini telah dipersenjatai dengan feature FIT (Fast Ink Top-Up Technology) yang telah didesain sedemikian rupa untuk memudahkan pengguna dalam mengisi tinta dan kenyamanan membawa printer dalam perjalanan,” terang Husni.

Dalam penjualannya, kedua printer ini menargetkan SOHO sebesar 40% dan rumahan sebanyak 60%.  Menurut Husni, printer seharga US$ 142 dan US$ 186  ini akan dilempar ke pasar mulai awal bulan November 2010.


Lihat Brosur L100.pdf (1.09 MB
Lihat Brosur L200.pdf (1.08 MB) 

error 5200 pada canon ip2270

0 komentar
Ini trik hasil copas, dan sudah di tes hari ini ( 8 Des 2010) hasilnya, ok! It's Works!

Untuk printer canon yang ngadat dengan kode error 5200, begini caranya :
1. Cabut power pada listrik langsung saat printer masih menyala,
2. Tarik ketengah cartridge secara manual (biasanya cartridge+ rumahnya ada disebelah kanan)
3. lepas pengaman cartridge, lalu lepas semua cartridge.
4. Biarkan pengaman terbuka, lalu hidupkan printer.
5. Setelah itu rumah cartridge akan bergerak ke kanan ke kiri tetapi membentur sisi kanan dan kiri karena pengaman belum ditutup
6. Setelah itu masukkan cartridge kedalam rumahnya,lalu jalankan printernya
7. Selesai. Printer kembali dapat dioperasikan.
selamat mencoba. Semoga sukses!


Manual reset MP145
Error Code CanonMP145/150/160
Resetter EPSON, Canon download page

SSC Service Utility

30 komentar


SSC Service Utility allow you to do many amazing things with Your Epson printer :
1) Work directly with CSIC in Epson Stylus printers cartridges.
2) Reset or rewrite any chip using special addon device.
3) Freeze internal ink counters.
4) Reset internal ink counters even with empty cartridges.
5) Separate cleaning of color and black heads for all Epson inkjet printers, powerful cleaning mode.
6) Hot swapping of cartridges supported.
7) Resetting of protection counter (even then it is already full).
8) More then 100 different Epson printers supported

This allow many people with high printing demands to save some money (program works with both black and color cartridges).

Up to day this software works under Windows 95/98/ME/2K2/XP with both the LPT and USB printers.

NOTE ! You can lost Epson lifetime guarantee on print head by refilling ink cartridges!

Latest versions changes:
New in 4.30:
- support for R270
- support for R240
- support for R340
- support for CX2800
- support for CX3900
- support for CX4900
- support for CX5900
- support for C58/C59
- support for RX640
- improved support for C2100/2200
- improved support for RX700
- improved support for R2400
- improved support for 785EPX/825/895/915
- some other improvements and bug fixes

- support for CX4200/CX4700/CX4800/DX4200/DX4800
- support for C47/C48
- support for RX430
- support for CX6500/CX6300
- improved support for CX6400/CX6600
- improved support for RX500/RX510
- improved support for RX600/RX610
- improved support for R1800
- improved support for CX3700/CX3800/DX3800/DX3850
- improved support for C67/C68/D68
- improved support for C87/C88/D88

- support for PM-970C
- support for PictureMate
- support for RX700
- support for R2400
- support for PM-A700
- support for PM-G720
- support for RX520
- support for CX7800
- support for CX4100
- support for DX3800
- support for CX3800/CX3810
- support for CX3700
- support for C67/68 and Photo Editions
- support for C87/C88/D88 and Photo Editions
- support for R220/R230
- support for R320
- support for CX4500
- support for CX3650
- support for CX4600
- support for CX5300
- support for CX5100
- support for RX420
- support for RX425
- support for RX620
- support for R1800
- improved support for almost all other printers
- improved ink freezer
- improved ink monitor, implemented status information
- protection counter reset improvements
- various bug fixes


Download SSCServe 4.30 


EPSON Adjustment Program (Resetter) Download Page
Canon Resetter Download Page

resetter canon ip2770

0 komentar
 Berikut adalah cara untuk mereset canon ip 2770.


Langkah pertama adalah melakukan manual reset pada printer. Caranya:
1. Cabut AC Cord (sambungan listrik) dan pastikan tidak ada koneksi apapun ke dari printer
2. Tekan dan tahan tombol power, colokkan AC cord.
3. LED hijau menyala, tahan tombol power dan tekan tombol resume dan tahan kedua tombol.
4. Lepas tombol power dan tahan tombol resume, tombol LED berganti kuning.
5. Lepas tombol resume, printer sekarang berada dalam keadaan service mode.
6. Tekan tombol resume 4 kali
7. Matikan printer / cabut AC cord
8. Nyalakan ulang printer

Resetter ip2270 versi downloadable, download

Resetter Canon List on Download Page


Manual Reset Canon MP145
Manual Reset Canon IX4000/IX5000

Cara Reset Samsung ML-1640 

Resetter EPSON list

Mereset SAMSUNG ML-1640

0 komentar

Download Samsung ML1640 EEPROM resetter.

Copasnya copas yang punya jg copas, akhirnya saya copas jg.. Gak apa ya? semoga berguna...


Produsen printer sekarang makin pinter. Kita sebagai maling juga pinter searching, apalagi ada master google.

Samsung ML-1640 generasi printer laser murah meriah. Bandel dan handal utk operasional harian. Namun ada sayangnya, printer ini berhenti bekerja setelah 2100 halaman. Printer akan nge Blink merah terus menerus.. bener-bener nggaplek i..

Kita diharuskan mengganti cartridge nya setiap 2100 agar bisa jalan lagi. wakaakaka… betul-betul strategi marketing yg bagus. Padahal orang indonesia biasa melakukan isi ulang toner selama drum masih bagus.
Bisa dibayangkan ganti cartridge = 750 rb an, sementara isi ulang = 100 rb. Setiap 1000 lembar perlu dilakukan isi ulang atau ganti cartridge… wow…

Oke deh, bagi yg terbiasa isi ulang kita perlu sedikit usaha utk reset ML-1640 ini. Bagi anda yang tidak ingin beresiko dapat di isi ulang di tempat" pengisian toner.

Yang perlu Anda lakukan lakukan hal berikut :
1. Buka cover belakang, cuman membuka dua mur kok.


2. Lihat pada board hijau di sebelah kanan


3. Nah ini dia senjata rahasia kita, kabel kecil..


4. Hubungkan PIN 1 dan 4 pada kaki IC kecil disamping processor


Kalau ingin disoder gpp kayak gambar di atas itu disoder.
Tapi aku sendiri susah utk menyoder barang sekecil itu.. hehehehe (bilang aja gak bakat !!!).

Ya udah kalau gak kepingin ya tinggal dihubungkan saja, lalu hidupkan printer dalam kondisi kabel masih menancap di pin 1 dan 4, selama lebih kurang 15 detik lah. Nanti warna blink akan berubah hijau…

Sekarang Printer Sudah siap.....

EPSON Adjustment Program download Page
Canon Resetter Software

Cara Reset Blingking pada EPSON TX 210 dengan Adjustment Program

1 komentar
Berikut adalah cara untuk mereset blingking pada EPSON TX210.

Langkah awal adalah memastikan bahwa printer tersebut adalah benar-benar blingking yang dimaksudkan di sini, yaitu point pada conter waste inkpad telah tercapai. Artinya printer dalam keadaan terkunci. Biasanya bisa dilihat dari layar display pada printer menunjuk angka ?.Cara lain bisa dipastikan dengan menggunakan software Resetter / Adjustment Program.

Download dulu softwarenya disini. Lalu simpan dan jalankan..
Langkah pertama akan muncul pilihan, klik OKuntuk melanjutkan.

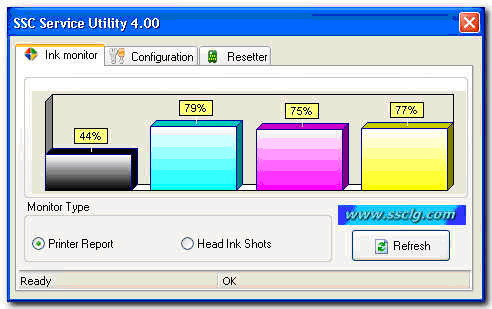
Akan muncul seperti gambar di atas, klik Select dan pilih port USB yang terhubung pada printer yang akan dikerjakan.

Pada halaman berikut, pilih pada Maintenance, Waste Inkpad Counter. Ini akan memberi informasi kepada anda status couter pada printer yang sedang dikerjakan. Beri centang pada Main  lalu klik Read untuk membaca status counter.

Jika angka counter mendekati 100% atau lebih. Maka benar jika printer tersebut sedang dalam keadaan overload atau sering disebut blingking. Untuk melanjutkan proses Reset, ada baiknya anda periksa lagi kondisi pembuangan tinta. Jika anda menggunakan saluran pembuangan luar, tidak ada masalah untuk melanjutkan. Tapi jika tidak menggunakan saluran pembuangan luar maka printer harus dibongkar untuk penggantian absorber.

Selanjutnya untuk meresetnya ke 0% lagi lakukan centang kembali dan klik Initialization.

Adjustment Program meminta anda untuk mematikan printer. Cukup matikan tombol power saja tanpa harus mencabut aliran listrik. Tunggu hingga printer dalam keadaan off. Lalu tekan OK.


Nyalakan ulang printer, tunggu hingga printer dalam keadaan siap(lampu hijau menyala konstan, tidak berkedip). Lalu lakukan pembacaan counter seperti langkah di atas, dan pastikan angka counter telah 0 yang berarti bahwa printer telah bisa digunakan kembali.

Tutup program Adjustment. Selesai

TX210 Adjustment Program download link: http://www.ziddu.com/download/12745140/TX210.exe.html

Tanda kerusakan pada printer EPSON

0 komentar
INK/Paper LED Power LED   Status
       
OFF OFF   Printer Off
Blink(Slow) ON   Low Ink(s)
OFF ON   Normal/Ready to Job
OFF Blink   Busy
ON ON   No Cartridge / Cartridge Error / No Paper
Blink OFF   General Error / Mechanic Error
Blink(Slow) OFF   Internal Error
Blink Blink flip/flop Waste Inkpad Full

Manual Reset Canon IX4000/IX5000

0 komentar
To reset counter Canon PIXMA iX4000 or iX5000 you have to enter to service mode.
Procedure to enter to service mode on Canon PIXMA iX4000 or iX5000 is as following :

Connect the Canon PIXMA iX5000 or iX4000 printer to the power cord. ( note : If the
automatic power-on function is enabled in the printer, the printer enters the service
mode for the first time, but it will never enter the service mode if the printer is
turned off by the Power button. This is because the printer remains to be turned on
internally if the power is turned off by the Power button. To prevent this,
disconnection of the power cord is required before starting the printer in the service
mode ) .

With the Canon PIXMA iX5000 or iX4000 printer powered off, while pressing the Resume/
Cancel button, press and hold the Power button. (note : Don’t release the buttons.
The Power LED lights in green to indicate that a function is selectable.)

While holding the Power button, release Resume/Cancel button. (Don’t release the Power
button.)

While holding the Power button, press Resume/Cancel button 2 times, and then release
both the Power and Resume/Cancel buttons.

When the Power LED lights in green, press the Resume/Cancel button 4 times to reset
waste ink counter in the Canon Pixma iX5000 / iX4000. (note : If the Power LED does
not light in green the printer does not enter the service mode, disconnect the power
cord and plug it again. Then start from step 1 to start the printer in the service
mode again).

At the end of the service mode, press the Power button. The paper lifting plate of
the sheet feed unit will be raised.
Note :

Each time the Resume/Cancel button is pressed, the Alarm and Power LEDs light
alternately, Alarm in orange and Power in green, starting with Alarm LED.
Other specified number of time(s) according to the function listed in the table below.

Time(s) LED indication Function Remarks
0 times Green (Power) Power off
1 time Orange (Alarm) Service test print
2 times Green (Power) EEPROM information print
3 times Orange (Alarm) EEPROM initialization
4 times Green (Power) Waste ink counter resetting
5 times Orange (Alarm) Destination settings
6 times Green (Power) Print head deep cleaning (Cleaning of both black and color)

Manual Reset MP145

0 komentar
Service mode operation procedures -

1) With the printer powered off but connected to a power source, press the
Power button while pressing and holding

the Stop/ Reset button.

2) When the Power LED is lit, press the Stop/Reset button two times while
pressing and holding the Power button.

3) When releasing the Power button and the Stop / Reset button (regardless of
order), the printer will move into a

service mode. (Waiting for menu selection)

4) When the LED lights in green, press the Stop/Reset button the specified
number of time(s) according to the

function listed in the table below.(Each time the Stop/Reset button is pressed,
the LED lights alternately in

orange and green, starting with orange.)

The number of the Reset

button pressing

LED Function Remarks

0 time Green Power off

1 time Orange Service pattern print

2 times Green EEPROM print

3 times Orange EEPROM reset

4 times Green Waste ink counter reset See waste ink counter reset

procedures below.

5 times Orange Destination setting See Destination setting

procedures below.

6 times Green Print head deep cleaning

11 times Orange Button / LCD checking

12 or more times Returns to a menu selection 

EPSON Adjustment Program (Resetter) download Links

5 komentar
All Adjustment Program are no windows driver needed. No need to extract or change windows time or change anything. Just download, save on your harddrive and run the Adjustment Program. Enjoy!

EPSON T Series
EPSON T11
EPSON T13

EPSON T20E
EPSON T30
EPSON T40W
EPSON T50
EPSON T60
EPSON T1100(A3)

EPSON TX Series
EPSON TX101
EPSON TX111
EPSON TX200
EPSON TX210
EPSON TX300F
EPSON TX400
EPSON TX510
EPSON TX700


C Series:
EPSON Stylus C20/C40
EPSON Stylus C45
EPSON Stylus C58
EPSON Stylus C580
EPSON Stylus C60
EPSON Stylus C61
EPSON Stylus C63
EPSON Stylus C65
EPSON Stylus C67
EPSON Stylus C70/C80
EPSON Stylus C79

EPSON Stylus C82
EPSON Stylus C83/C84
EPSON Stylus C87
EPSON Stylus C90
EPSON Stylus C92 
EPSON Stylus C110

CX Series:
EPSON CX1500
EPSON CX2800
EPSON CX3100
EPSON CX3500/3600/3650/4500/4600
EPSON CX3700
EPSON CX3900
EPSON CX4700
EPSON CX4900
EPSON CX5100
EPSON CX5500
EPSON CX5900

EPSON CX6500
EPSON CX6900F

EPSON CX7300
EPSON CX8300
EPSON CX9300F

EPSON R Series:
EPSON R210
EPSON R230
EPSON R250
EPSON R270
EPSON R290
EPSON R310
EPSON R350
EPSON R390
EPSON R800
EPSON R1800

EPSON RX Series:
EPSON RX420
EPSON RX510
EPSON RX640
EPSON RX630
EPSON RX650
EPSON RX700

EPSON SP/SC Series:
EPSON SC900
EPSON SC600/640/660
EPSON SP880
EPSON SP900
EPSON SP870/ SP1270(A3+)
EPSON SP890/ SP1280/ SP1290 (A3+)
EPSON SP1390(A3)

Canon Resetter Download Links

Code Error canon MP145, MP150, MP160

0 komentar
ID: Code Error canon MP145, MP150, MP160 :

E2-2 = tidak ada kertas atau priter tidak bisa narik kertas (bisa karena roll kotor)
E3-3 = Paper jam
E4 = tidak ada tinta/cartridge
E5-5 = ink cartridges tidak terpasang atau cartirdge yang terpasang salah (tidak compatibel)
E8 = absorber full, atau platen waste ink absorber full mita direset
E9 = hubungan ke digital camera / video camera tidak support
E14 = Ink cartridges whose destination are wrong
E15 = Ink cartridge tidak terpasang
E16 - Ink remaining is unknown
E16 -E19 = masalah pada scan head alignment sheet
E22 = Carriage error
E23 = Paper feed erro
E24 = Purge unit error (bagian cleaning head)
E25 = ASF(cam) sensor error
E26 = Internal temperature rise error
E27 = ink absorber full or platen waste ink absorber full > reset dengan toolsnya
E28 = Ink cartridge temperature rise error -
E29 = EEPROM error
E33 = Paper feed position error
E35 15 = USB Host VBUD overcurrent error - USB
E37 17 = motor driver tidak normal
E40 20 = hardware lain error
E42 22 = Scanner error

EPSON C4x Adjustment Program

0 komentar
Ini adalah rilis terakhir yang telah support Epson C41SX, C41UX, C42SX, C42UX, C43SX, C43UX, C44, C45 dan C46. Kompatibel dengan OS Win9x/XP. File aslinya berupa sebuah folder yang berisi 4 file utama anatara lain Adjprog.exe, d4comm.dll, OsSwitch.dll, PrnDrvXP.dll, dan tambahan dari saya sebuah file ikon. Agar memudahkan pemakaian, saya jadikan beberapa file tersebut menjadi sebuah file .exe dengan menggunakan SFX Winrar.


Cara menggunakan Adjustment Program:
  1. Nyalakan printer dan koneksikan USB atau LPT printer.
  2. Download file adjustment program pada link diatas
  3. Buka file, tekan ok saat muncul pilihan.
  4. (lihat gambar diatas), pilih model name. Ini adalah seri printer yang akan di reset.
  5. Destination bisa pilih ESP/Asia Pasific
  6. Interface, pilih auto/pilih pilihan port yang terdeteksi pada komputer jika printer ada lebih dari satu.
  7. Tekan OK untuk masuk. 
  8. Di Maintenance, pilih Waste Inkpad Counter
  9. Klik Read untuk membaca counter
  10. Klik Reset untuk mereset counter
  11. Selesai, klik Read lagi untuk memastikan prosentase counter telah 0(ESP) atau 250(Asia Pasicic)

Cara Reset Canon IP2770 Error 5B00

8 komentar
Download Restter canon iP2770 v1074 bebas password di bawah ini :
http://www.ziddu.com/download/13305115/ServiceTool_V1074.rar.html


Masuk ke Service Mode iP2770 :

1. Printer dalam keadaan mati dan kabel listrik terpasang.
2. Tekan tombol RESUME 2 detik
kemudian tekan tombol POWER sampai lampu hijau nyala (saat menekan tombol POWER, ...tombol RESUME jgn dilepas dulu)
3. Kemudian lepas tombol RESUME, tapi jangan lepas tombol POWER.
4. Sambil tombol POWER masih tertekan, tekan tombol RESUME 5 kali. Led akan menyala bergantian orange hijau dengan nyala terakhir orange. (jangan sampai keliru 4x karena printer akan mati total, tapi sifatnya sementara juga) Kemudian ...
5. Lepaskan kedua tombol bersamaan.
6. Led akan blink sebentar kemudian akan nyala HIJAU.
7. Komputer akan mendeteksi device baru, abaikan saja .....
8. Keadaan ini menunjukkan printer iP2770 dalam keadaan SERVICE MODE dan siap direset.

Kemudian jalankan Resetter iP2770 v1074 nya:
1. Exctract File Resetter iP2770.
2. Siapkan 2 kertas di printer (ini untuk print pada waktu proses reset).
3. Jalankan program Resetter iP2770


4. Klik "MAIN", maka printer akan berproses, kemudian iP2770 akan print satu halaman dengan tulisan " D=000.0 "


5. Klik " EEPROM Clear ".
6. Kemudian klik " EEPROM ", dan printer akan print hasil Resetter iP2770. Salah satu barisnya tulisannya sbb:
"TPAGE(TTL=00000)"


7. Matikan Printer dengan menekan tombol POWER.
8. Selesai...

Selamat mencoba ... Semoga berhasil ..

Mengatasi e27 pada Canon MP198

0 komentar
Cara Resetter Canon MP198 error E27

1. Printer dalam keadaan mati dan kabel listrik terpasang.
2. Tekan dan tahan STOP/RESET kemudian tekan dan tahan POWER.
3. Lepas tombol STOP/RESET (tombol POWER jangan dilepas)
4. Tekan STOP/RESET 2 (dua) kali, kemudian lepaskan tombol POWER
5. Biarkan Lampu Hijau blink / kelip2x sampai head printer berhenti bergerak. Dan LED panel menunjukkan angka NOL.
6. Komputer akan mendeteksi hardware baru, abaikan saja.....
7. Keadaan ini menunjukkan printer MP198 dalam keadaan SERVICE MODE dan siap direset.

DOWNLOAD PROGRAM RESETTER MP198 di SINI.

1. Exctract File Resetter MP198.
2. Siapkan 2 kertas di printer (ini untuk print pada waktu proses reset)
3. Jalankan program Resetter MP198.


4. Klik "MAIN", maka printer akan berproses, kemudian MP198 akan print satu halaman dengan tulisan " D=000.0 dan ...."

5. Klik " EEPROM Clear ".

6. Kemudian klik " EEPROM ", dan printer akan print hasil Resetter MP198. Salah satu barisnya tulisannya sbb:
"TPAGE(TTL=00000 COPY=00000)"

7. Matikan Printer dengan menekan tombol POWER.

8. Selesai...

Selamat mencoba ... 

Copyright © Share Your Knowledge